nftables Lab Setup#
This document describes how to set up a lab environment for testing nftables configurations and learning nftables.
First Setup: netns#
Create a network namespace:
sudo unshare -r --net bash
ip a
echo $$
Save the PID number from echo $$.
On Host Network#
ip link add veth_host type veth peer name veth_guest && \
ip link set veth_guest netns <PID>
The veth_guest interface is moved to the secondary terminal.
Adding an IP#
On host:
sudo ip link add br0 type bridge && \
sudo ip link set veth_host master br0 && \
sudo ip link set veth_host up && \
sudo ip addr add 10.0.0.1/24 dev br0 && \
sudo ip link set br0 up
On guest:
ip addr add 10.0.0.2/24 dev veth_guest && \
ip link set veth_guest up
Lab Setup: Version 2#
Create three network namespaces: two PCs and one router.
Setup Terminal & netns#
Run in three different terminals:
unshare -r --net bash
echo $$
Remember each PID!
Create the Interface#
Run on the host (replace PIDs as needed):
sudo ip link add veth_pc1 type veth peer name veth_pc
sudo ip link set veth_pc netns <PC1_PID>
sudo ip link set veth_pc1 netns <ROUTER_PID>

sudo ip link add veth_pc2 type veth peer name veth_pc
sudo ip link set veth_pc netns <PC2_PID>
sudo ip link set veth_pc2 netns <ROUTER_PID>
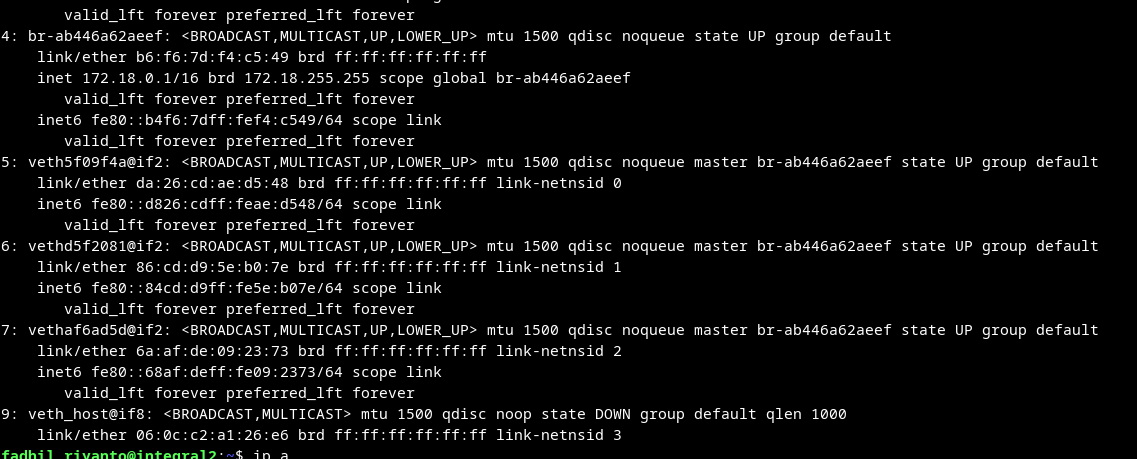
Result:
Router:
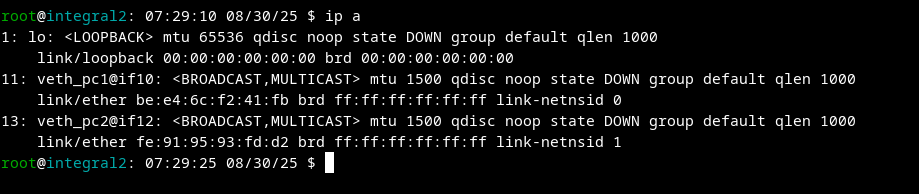
PC 1:

PC 2:

Assign IP Addresses#
Scheme:
- PC1
Network:
10.0.80.0/24veth_pc@if11:10.0.80.2/24
- PC2
Network:
10.0.200.0/24veth_pc@if13:10.0.200.2/24
- Router
veth_pc1@if10:10.0.80.1/24veth_pc2@if12:10.0.200.1/24
Commands:
# on pc 1
ip addr add 10.0.80.2/24 dev veth_pc
ip link set veth_pc up
ip route add default via 10.0.80.1

# on pc 2
ip addr add 10.0.200.2/24 dev veth_pc
ip link set veth_pc up
ip route add default via 10.0.200.1

# on router
ip addr add 10.0.80.1/24 dev veth_pc1
ip addr add 10.0.200.1/24 dev veth_pc2
ip link set veth_pc1 up
ip link set veth_pc2 up
sysctl -w net.ipv4.ip_forward=1
Linux automatically creates routes:
ip r
10.0.80.0/24 dev veth_pc1 proto kernel scope link src 10.0.80.1
10.0.200.0/24 dev veth_pc2 proto kernel scope link src 10.0.200.1
Note: For a simpler setup, see: https://gist.github.com/fadhil-riyanto/1db84f4cf3f79b5ea8e2f04c2b540183
QEMU#
To run this lab setup in QEMU, use the following command. Teletype terminal is used to prevent disconnection when using SSH.
qemu-system-x86_64 -name guest=ubuntu22.04 \
         -machine type=pc,accel=kvm \
         -cpu host -m 4G -smp 4 \
         -enable-kvm \
         -boot order=d \
         -drive if=pflash,format=raw,readonly=on,file=/usr/share/edk2/x64/OVMF_CODE.4m.fd \
         -drive if=pflash,format=raw,file=./nvram/OVMF_VARS_ubuntu_server_gpt.4m.fd \
         -drive file=./images/ubuntu-server-btik-captive-portal.img,format=qcow2 \
         -netdev user,id=net0,hostfwd=tcp::20022-:22,hostfwd=tcp::10000-:5432,hostfwd=tcp::10302-:10302,hostfwd=tcp::8080-:8080,hostfwd=udp::1813-:1813,hostfwd=udp::1812-:1812 \
         -device virtio-net-pci,netdev=net0 \
         -nographic \
         -serial mon:stdio \
         -device virtio-serial \
         -chardev pty,id=char0 \
         -device virtconsole,chardev=char0 \
         -chardev pty,id=char1 \
         -device virtconsole,chardev=char1
Tricks#
in order to map PID into namespace without hassle, use Map PID to namespace